Xero Sync Setup & Usage Guide
Follow these steps to connect monday.com and Xero, and learn how to use the integration.
Getting Started
Follow these simple steps to set up your Xero integration. The entire process takes less than 5 minutes!
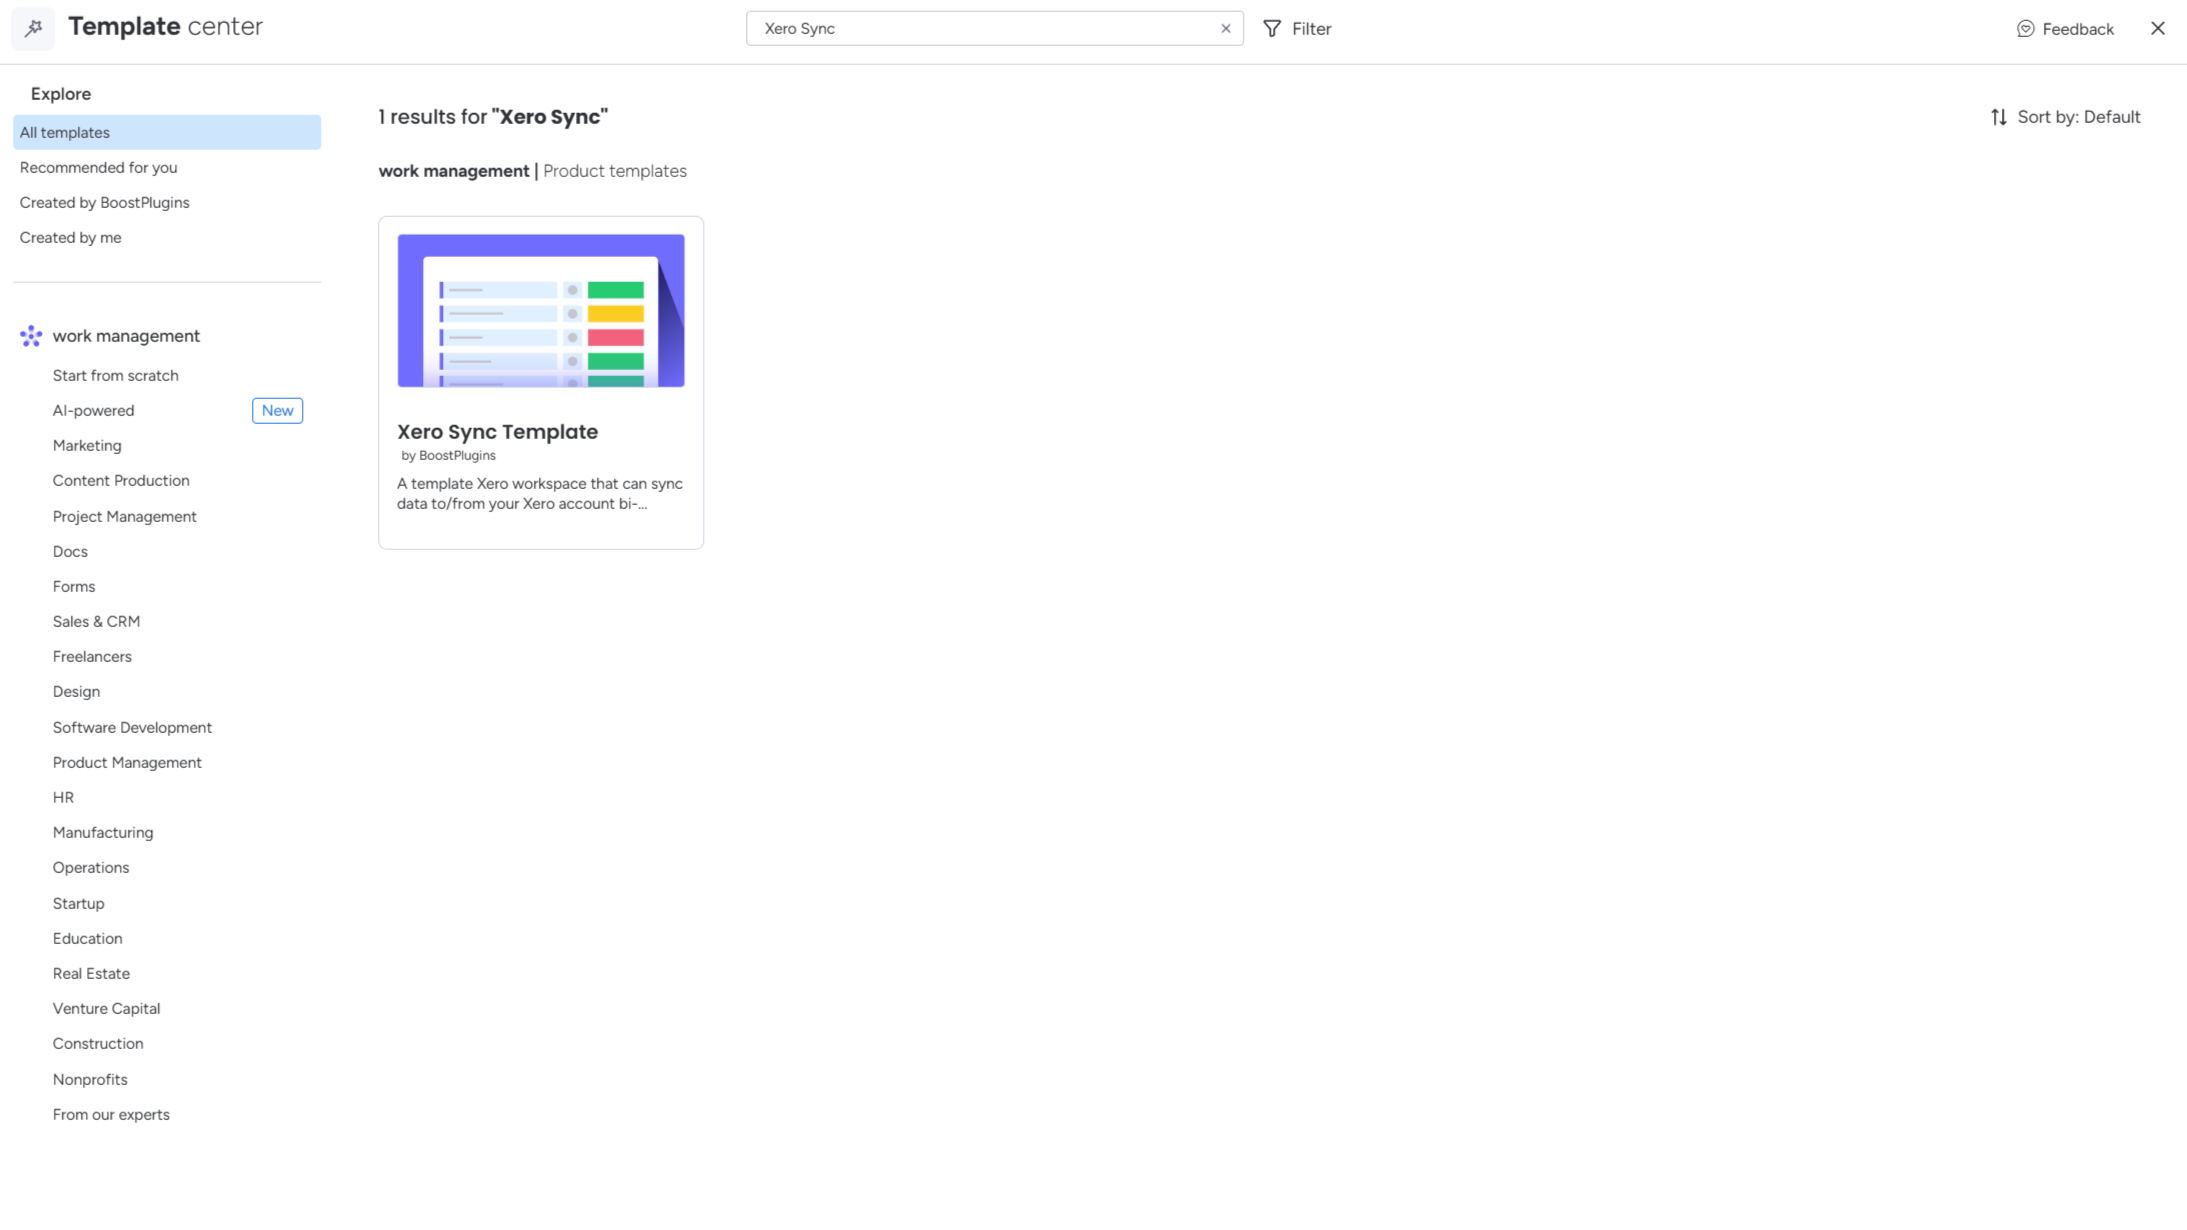
Install from monday.com's Template Center
Find and install the Xero Sync template from the template center.
- 1. Open monday.com's Template Center from your workspace
- 2. Search for 'Xero Sync' in the search bar
- 3. Click the 'Use Template' button inside the Xero Sync card
- 4. Select your target workspace from the dropdown
- 5. Click 'Add to Workspace' to complete installation
Accept monday.com permissions
Authorize the app to access your monday.com data (if not already done).
- 1. Click 'Authorize monday.com' when the popup appears
- 2. Review the permissions being requested
- 3. Click 'Allow' to grant access to your workspace
- 4. Wait for the confirmation message to appear
Connect Your Xero Account
Link your Xero account to enable bi-directional data synchronization.
- 1. Click the 'Connect to Xero' button
- 2. Enter your Xero login credentials
- 3. Select which organizations to grant access to
- 4. Click 'Allow access' to complete the connection
- 5. Return to the integration page once redirected
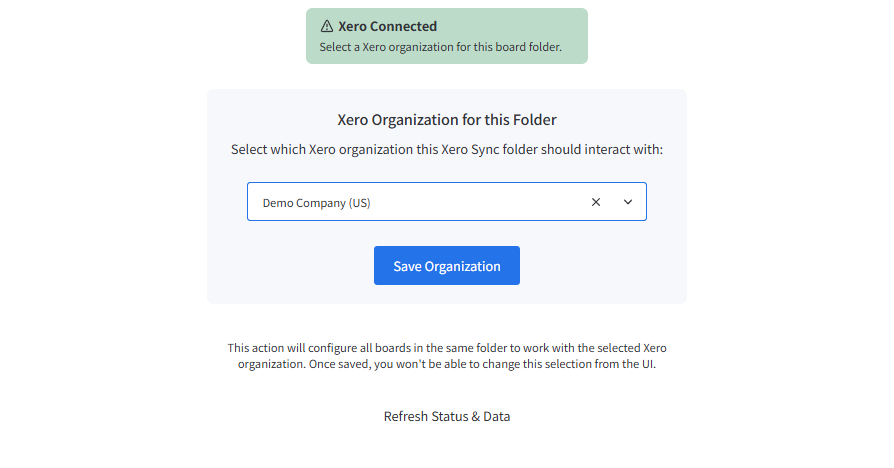
Select Your Xero Organization
Choose which Xero organization this template folder should sync with.
- 1. Open the dropdown menu
- 2. Select your desired Xero organization from the list
- 3. Click 'Save Organization' to confirm your selection
- 4. Wait for the folder name to update with your selected organization's name
How to Use the Template
Learn how to create, sync, and manage your data between monday.com and Xero using the pre-built automations.
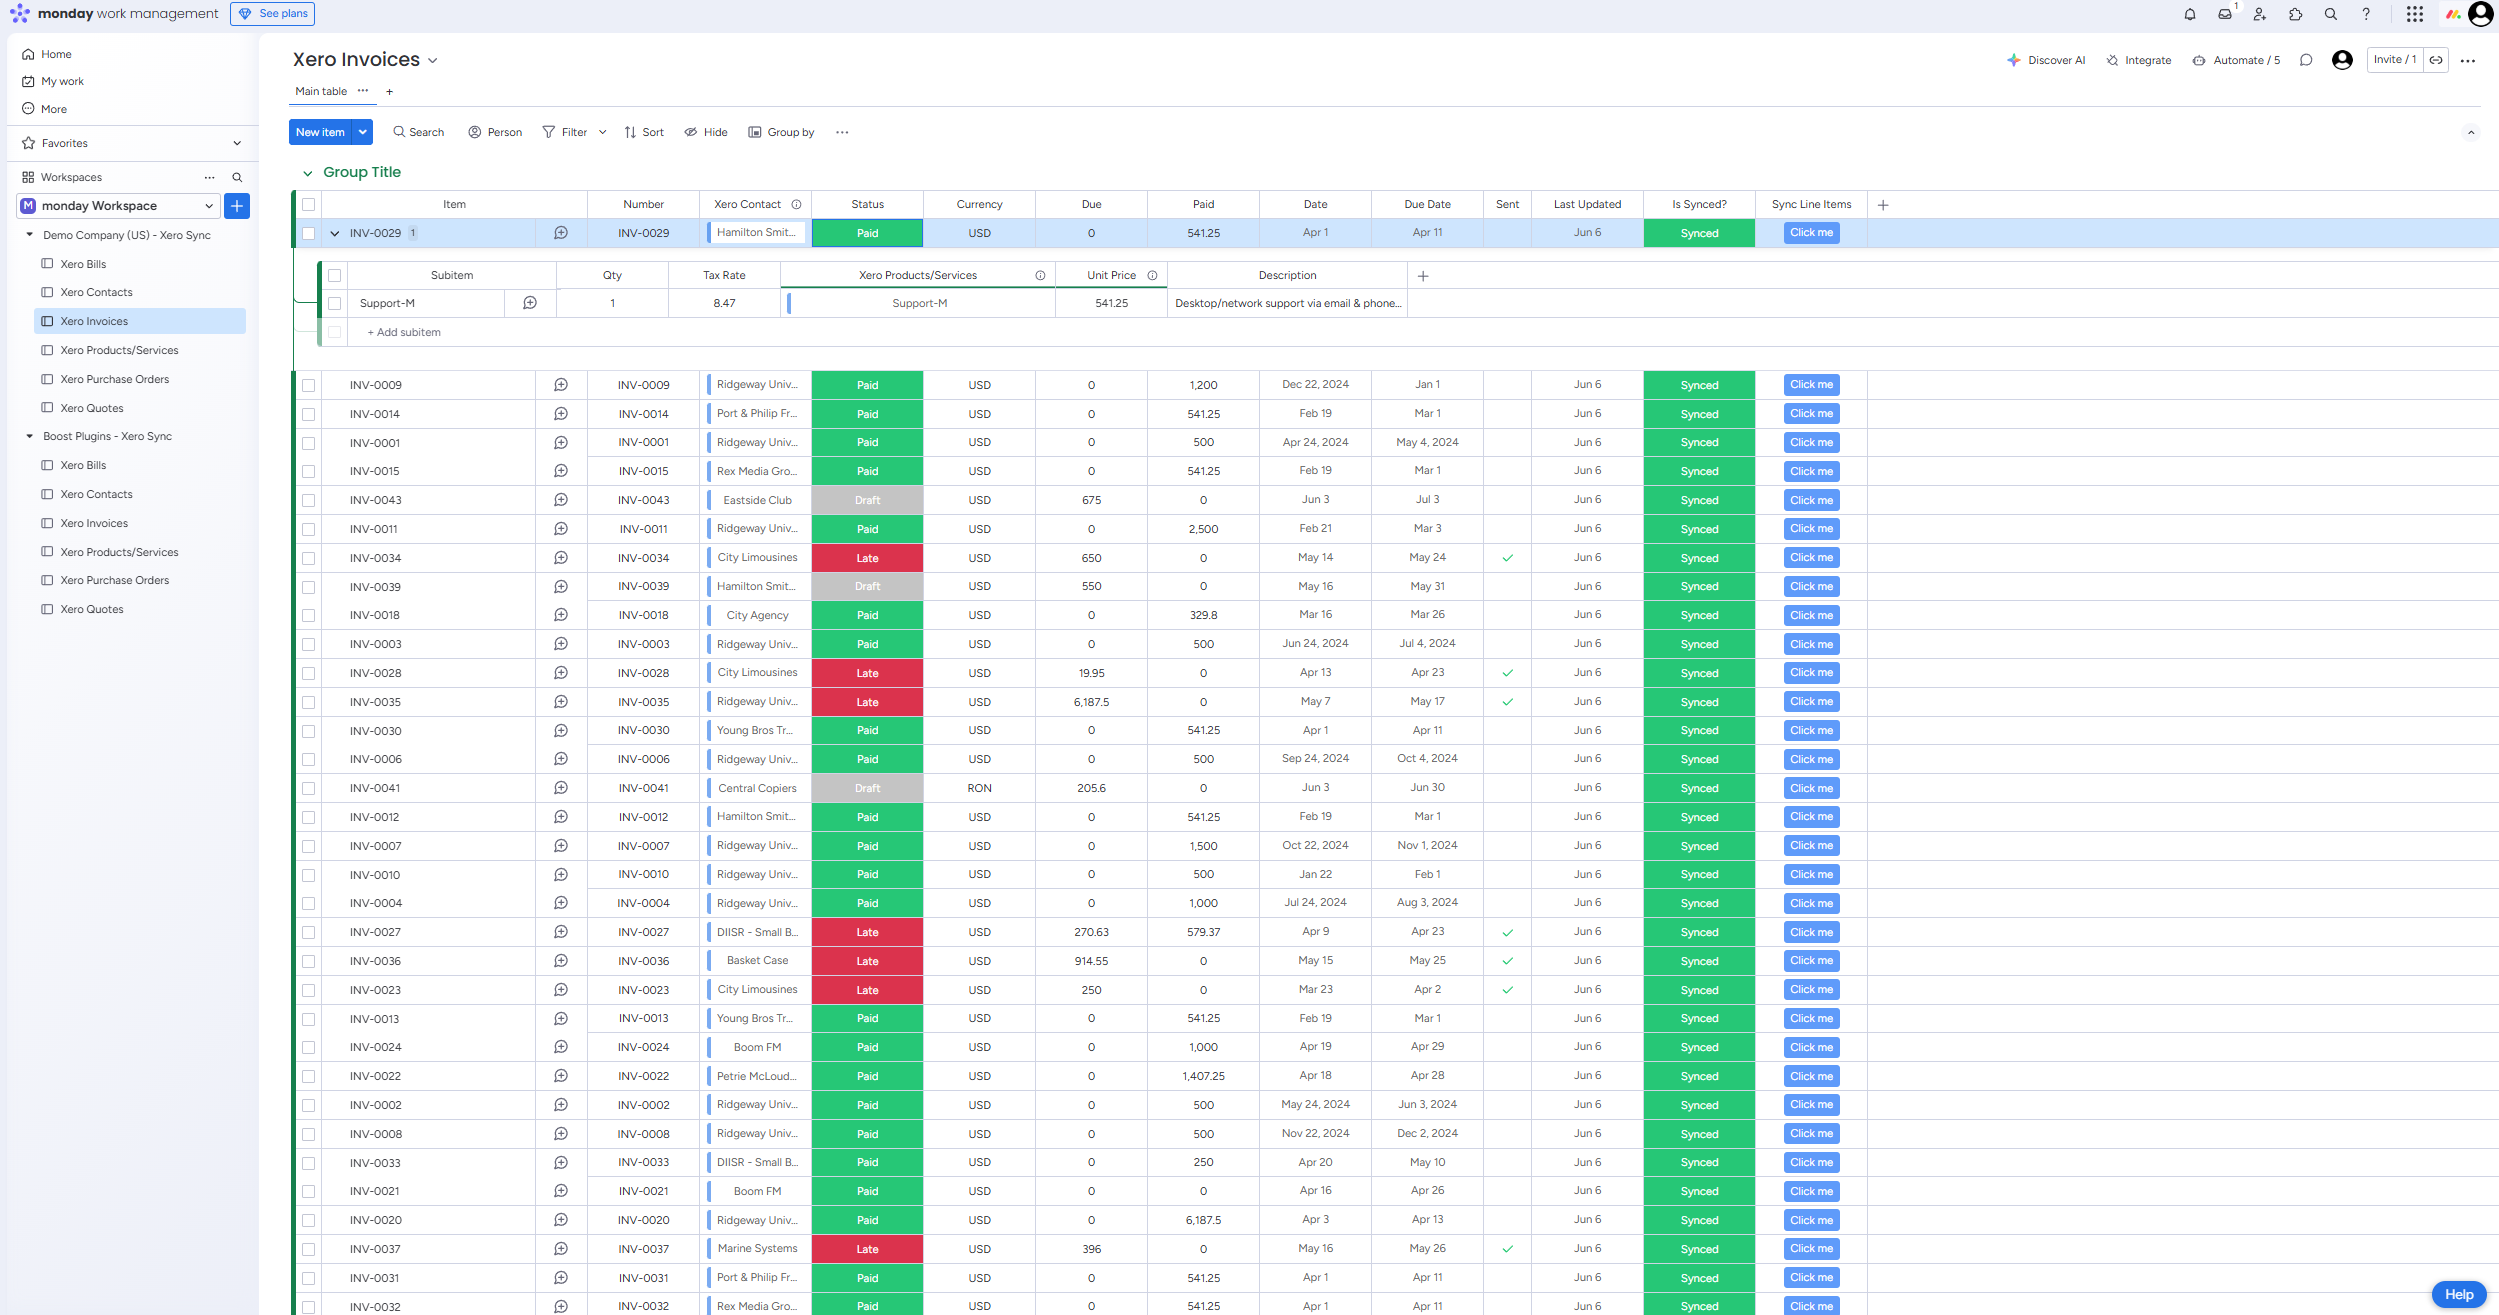
Creating Items in Xero
Add items to your monday.com boards and send them to Xero.
- 1. Navigate to the appropriate board (Invoices, Bills, etc.)
- 2. Click 'New Item' to add a new row
- 3. Fill in the desired fields (contact, amount, due date, etc.)
- 4. Choose how to initiate the creation:
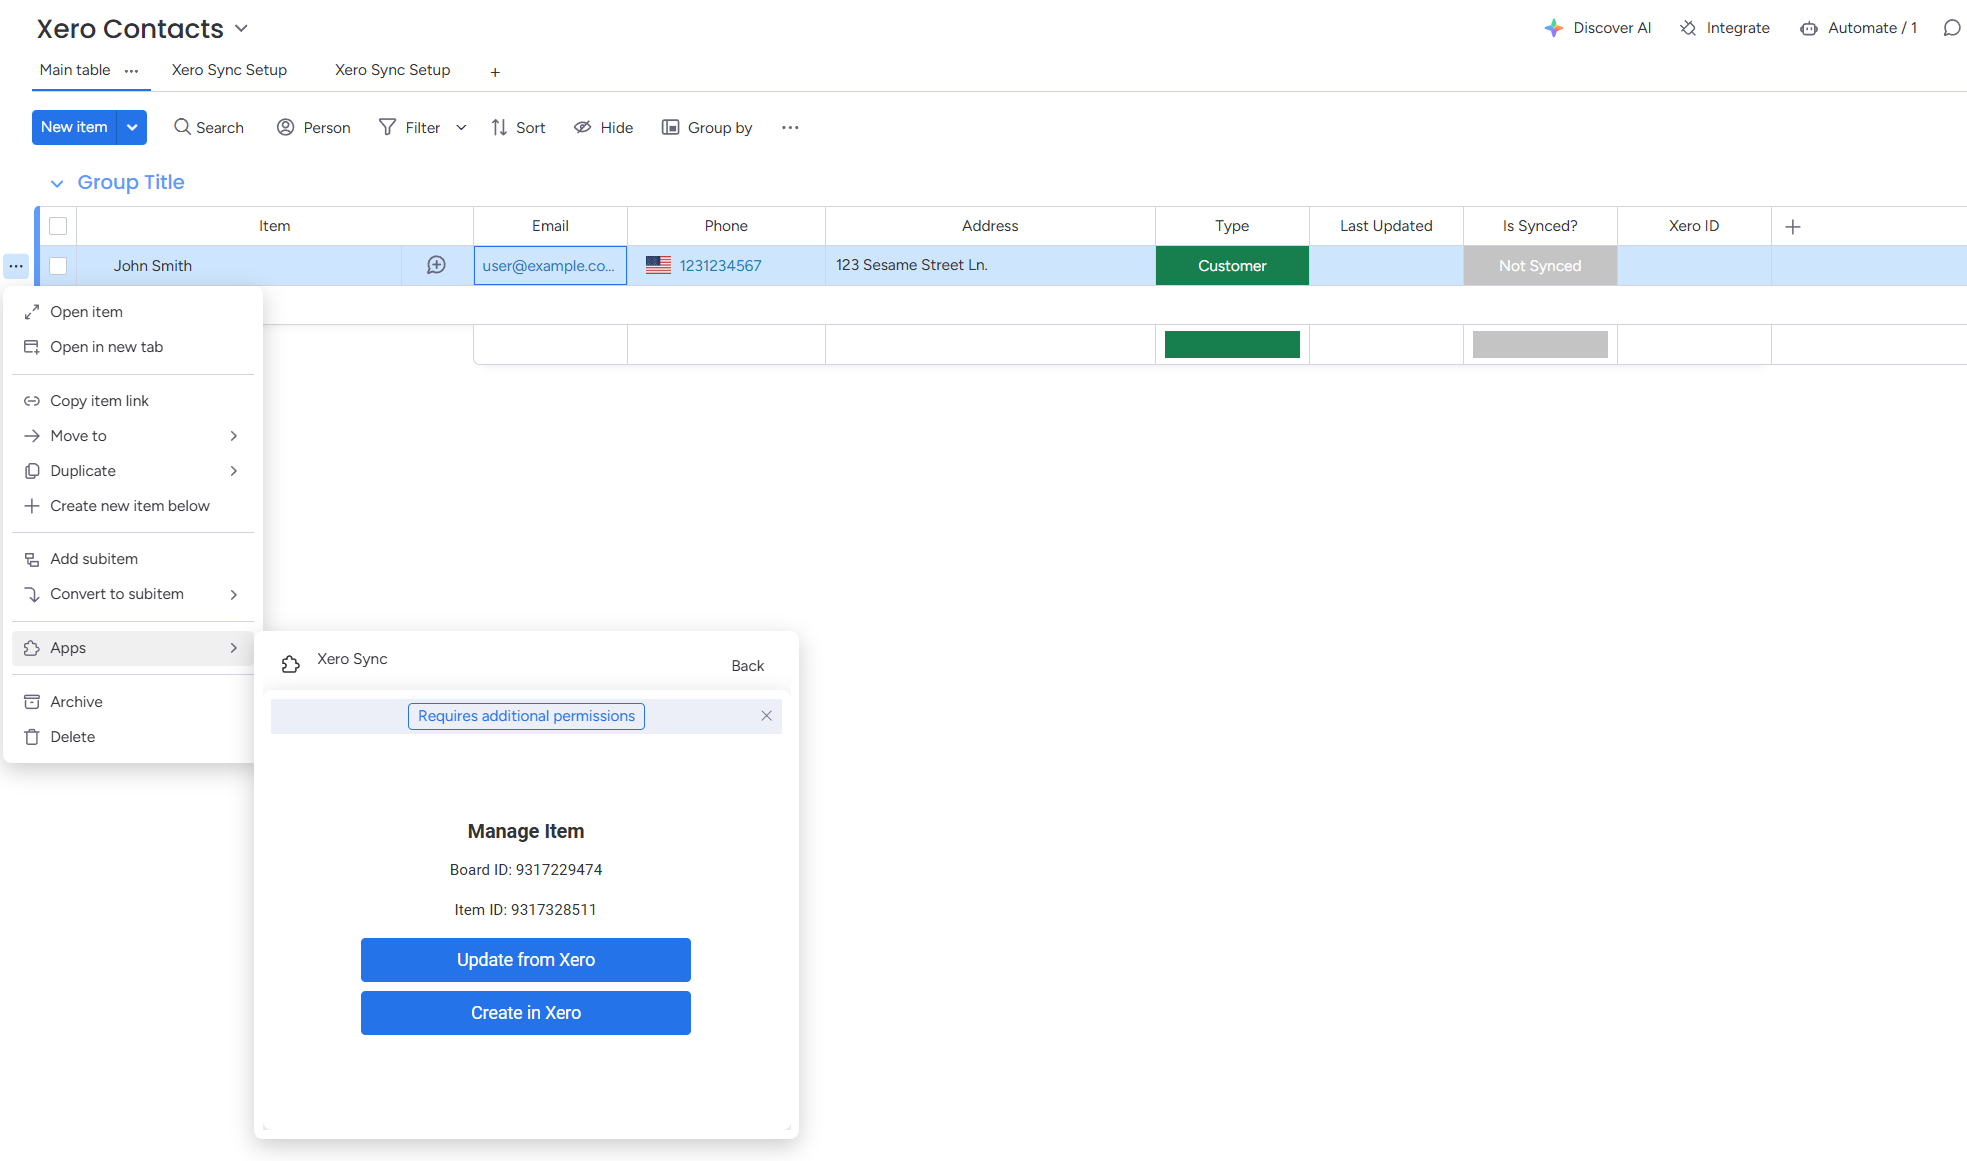
- • Single Item: Click the item's menu (...) → 'Create in Xero'
- • Group Create: Click the group menu (...) → create all items in that group
- • Board Create: Click the column extension menu (...) for entire board creation
- • Custom Automation: Create your own triggers using the Xero Create action
- 5. Wait and check that the 'Is Synced' column gets updated successfully
Syncing from Xero
Multiple ways to pull existing data from Xero into your monday.com boards.
- • Automatic Sync: Template runs daily syncs automatically at midnight
- • Single Item: Click the item's menu (...) → 'Update from Xero'
- • Group Sync: Click the group menu (...) → sync all items in that group
- • Board Sync: Click the column extension menu (...) for entire board updates
- • Custom Automation: Create your own triggers (hourly, weekly, etc.) using the Xero Sync action
Managing Multiple Organizations
Install additional templates to manage multiple Xero organizations.
- 1. Go back to monday.com's Template Center
- 2. Search for 'Xero Sync' again
- 3. Click 'Use Template' to install a second copy
- 4. Choose the same or different workspace
- 5. Connect to your second Xero organization
- 6. Notice the folder names now reflect each organization